DIY Basement Finishing: Essential Aspects for a Successful Project
Transforming an unfinished basement into a functional and inviting living space can be a rewarding and cost-effective project for homeowners. DIY basement finishing offers significant savings compared to hiring contractors, but it requires careful planning and execution. Here are the essential aspects to consider for a successful DIY basement finishing project:
1. Planning and Design:
Start by defining the intended use of your finished basement and create a detailed plan outlining the layout, electrical, plumbing, and ventilation requirements. Consider the size, shape, and lighting conditions of the space. Sketch out a floor plan that incorporates furniture placement, electrical outlets, and other features.
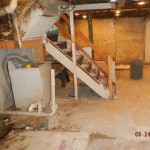
2. Demolition and Site Preparation:
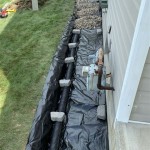
Remove any existing walls, partitions, or debris to clear the basement space. Level the floor, if necessary, and address any moisture or drainage issues. Install a vapor barrier on the floor and walls to prevent moisture buildup.
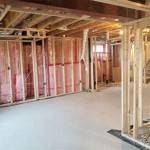
3. Insulation:
Insulate the basement walls, ceiling, and floor to improve energy efficiency and reduce heating and cooling costs. Choose insulation materials appropriate for the climate and space, such as fiberglass batts, spray foam, or rigid foam boards.
4. Electrical and Plumbing:
Run electrical wires and install outlets, switches, and lighting fixtures according to the electrical plan. Ensure all electrical work complies with local building codes and safety regulations. Install plumbing fixtures and pipes for bathrooms, laundry rooms, or kitchens, if necessary.
5. Drywall and Finishing:
Hang drywall on the walls and ceiling to conceal imperfections and create a smooth finish. Joint compound, tape, and sand the drywall joints to achieve a seamless appearance. Prime and paint the walls and ceiling to complete the interior finish.
6. Flooring:
Install flooring materials such as carpet, hardwood, laminate, or tile. Choose flooring that is durable, moisture-resistant, and complements the overall design scheme.
7. Trim and Moldings:
Add trim and moldings around windows, doors, and baseboards to enhance the aesthetic appeal and protect against moisture damage. Choose trim materials that complement the flooring and wall finishes.
8. Final Touches:
Install doors, hardware, lighting fixtures, and other finishing touches to complete the project. Furnish the space according to the intended use, and add decorative elements to create a comfortable and inviting atmosphere.
Additional Tips:
- Obtain necessary permits from local authorities as required.
- Follow manufacturer's instructions for all materials and components.
- Use proper safety equipment when handling tools and materials.
- Allow ample time for drying and curing throughout the process.
- Consider hiring a qualified electrician or plumber for complex electrical or plumbing tasks.
By following these essential aspects and tips, you can successfully transform your unfinished basement into a functional and stylish living space that adds value to your home.

Steps For Finishing Your Basement Budget Dumpster

Who Do You Hire To Finish A Basement

9 Steps To Finishing A Basement Moving Com

How To Finish A Basement Step By Guide

Diy Or Hire A Professional For Your Basement Remodel

The Ultimate Guide To Finishing A Basement Neighbor Blog

16 Basement Ideas Bob Vila

Finishing A Basement How To Guide Forbes Home

Finishing A Modular Home Basement Next

Ideas For Partially Finishing Your Basement
See Also