DIY Basement Waterproofing: A Comprehensive Guide
Waterproofing your basement is a crucial step in protecting your home from moisture damage, protecting both its structural integrity and your belongings. While hiring a professional is always an option, DIY basement waterproofing can be a cost-effective solution with proper guidance. Here's a comprehensive guide to help you tackle this essential home improvement project:
1. Assess the Source of Moisture
Before waterproofing, identify the source of moisture in your basement. Common culprits include leaks in walls, floors, or plumbing fixtures, as well as poor drainage around the perimeter of your home. Addressing the source will prevent future water seepage.
2. Seal Cracks and Joints
Inspect the walls, floors, and any visible plumbing for cracks or gaps. Use a hydraulic cement or epoxy-based sealant to fill in these voids. Pay special attention to areas where water pipes or electrical wires penetrate the basement.
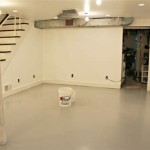
3. Install an Interior Drain Tile System
An interior drain tile system is a perforated pipe installed around the perimeter of your basement along the footing. It collects water seeping through the walls and floor and directs it to a sump pump, which will discharge it outside.
4. Check Sump Pump Functionality
A sump pump is a crucial part of any basement waterproofing system. It activates automatically when water levels rise, pumping the water out of your basement. Ensure that your sump pump is in good working order, regularly clean the basin, and consider installing a backup battery in case of power outages.
5. Slope the Ground Away from Your Home
Improper grading around your home can lead to water accumulation near your foundation. Create a slope that directs water away from your house by adding soil or installing a drainage swale.
6. Extend Downspouts and Gutters
Downspouts and gutters effectively channel rainwater away from your roof. Make sure they are extended to discharge water at least 6 feet away from your foundation. Consider installing underground downspout extensions for better drainage.
7. Maintain Gutters and Downspouts
Regularly clean your gutters and downspouts to remove debris and ensure proper water flow. Clogged gutters can overflow and direct water towards your foundation, increasing the risk of flooding.
8. Use Dehumidifiers
Excess moisture in the air can contribute to basement dampness, especially during humid seasons. Use a dehumidifier to control moisture levels and prevent condensation on walls and floors.
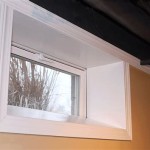
9. Ventilate Your Basement
Proper ventilation is essential for reducing moisture buildup. Install exhaust fans in areas prone to high humidity, such as bathrooms or laundry rooms. Open windows and doors when possible to allow for natural ventilation.
10. Inspect and Maintain Regularly
DIY basement waterproofing is a proactive measure that requires ongoing maintenance. Regularly inspect your system, including the drain tile, sump pump, and other components, for any signs of wear or damage. Address any issues promptly to ensure the continued effectiveness of your waterproofing measures.

Diy Basement Waterproofing By Triad

How To Waterproof A Basement Diy Waterproofing

Diy Basement Waterproofing Sealonce System Easy Installation Waterproof Com

Why Diy Basement Waterproofing Is A Bad Idea Foundations Ottawa

How To Waterproof Your Basement True Value

Do It Yourself Basement Waterproofing The Right Choice

Homeowner S Ultimate Basement Waterproofing Guide Forbes Home

How Does Interior Basement Waterproofing Work

Diy Basement Waterproofing Waterproof Your Walls And Flooring Life S Dirty Clean Easy

Basement Waterproofing System Products How To Waterproof A Diy Wet