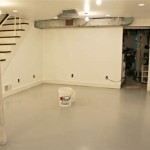
How to Drylock a Basement
If you're dealing with a damp or wet basement, Drylok can be an effective solution to seal out moisture and prevent further water damage. This article will guide you through the essential steps of applying Drylok to your basement walls and floor.
Materials You'll Need:
- Drylok Extreme or Drylok Floor & Wall Latex
- Paint roller and brush
- Drop cloths or plastic sheeting
- Squeegee or trowel (for applying to the floor)
- Cleaning solution (TSP or a bleach-based cleaner)
- Caulk gun and caulk
Step 1: Prepare the Basement
Begin by removing all furniture and items from the basement. Cover the floor and any remaining objects with drop cloths or plastic sheeting to protect them from paint splatters. Clean the walls and floor thoroughly using a cleaning solution to remove dirt, dust, and any existing mildew.
Step 2: Repair Cracks and Holes
Inspect the basement walls and floor for any cracks or holes. Fill these areas with a suitable patching compound or hydraulic cement. Allow the repairs to dry completely before proceeding.
Step 3: Apply Drylok to the Walls
Stir the Drylok thoroughly before use. Apply a thin, even coat of Drylok to the basement walls using a paint roller. Use a brush to apply Drylok around corners, outlets, and other detailed areas. Allow the first coat to dry completely, which typically takes several hours.
Apply a second coat of Drylok in the same manner as the first. This second coat will provide additional protection and ensure a waterproof seal.
Step 4: Apply Drylok to the Floor
For basement floors, you'll need to use Drylok Floor & Wall Latex. Apply a thin, even coat using a paint roller or brush. Use a squeegee or trowel to smooth out the Drylok and remove any excess.
Allow the first coat to dry completely before applying a second coat. Once the second coat is dry, you can walk on the floor as usual.
Step 5: Caulk Joints and Seams
After the Drylok has dried, apply a bead of caulk along all joints, seams, and any areas where water may enter. This will help to seal out any remaining moisture and prevent leaks.
Step 6: Ventilate the Basement
Once the Drylok has been applied, ventilate the basement by opening windows or using a fan. Drylok emits fumes during the drying process, so it's essential to provide adequate ventilation. Avoid breathing in the fumes.
Conclusion
By following these steps, you can effectively Drylok your basement to prevent moisture penetration and create a drier, healthier environment. Remember to wear appropriate safety gear, such as gloves and a mask, while applying Drylok and ventilate the area properly. With proper preparation and application, Drylok can provide long-lasting basement waterproofing, protecting your home from water damage and improving its overall condition.

Q A Waterproofing Your Basement With Drylok Waterproofer

Drylok Good Or Bad For Your Wet Basement

Waterproofing Basement Walls With Drylok Paint Home Repair Tutor

A Drier Basement With Drylok Extreme The Family Handyman

Waterproofing Basement Walls With Drylok Paint Home Repair Tutor

Q A Waterproofing Your Basement With Drylok Waterproofer

Q A Waterproofing Your Basement With Drylok Waterproofer

Waterproofing Basement Walls With Drylok Paint Home Repair Tutor

Basement Demo And Waterproofing With Drylok One Room Challenge Week 2 Holland Avenue Home

Waterproofing Sani Tred Vs Drylok Paint Reviews
See Also

