How To Plumb A Shower In A Basement
A basement shower is a desirable addition to any home, but it can seem like a daunting task to install one yourself. However, with the right tools and knowledge, it's entirely possible to complete this project without professional help.
This guide will provide you with step-by-step instructions on how to plumb a shower in a basement, from choosing the right materials to connecting the drain and water supply lines.
1. Planning and Preparation
Before you begin, it's essential to plan and prepare for the project. This includes gathering the necessary tools and materials, as well as obtaining any necessary permits from your local building department.
Tools:
- Adjustable wrench
- Pliers
- Hack saw
- Drill
- Level
- Tape measure
- Caulk gun
- Shop vacuum
Materials:
- Shower pan
- Shower drain
- P-trap
- PVC pipes and fittings
- Water supply lines
- Shower head
- Tile or other wall covering
- Grout
- Caulk
2. Installing the Shower Pan
The shower pan is the base of the shower and prevents water from leaking into the basement floor. Begin by setting the pan in place and leveling it with a level.
Once the pan is level, use a drill to create pilot holes around the perimeter of the pan. Then, secure the pan to the floor using screws.
3. Installing the Shower Drain
The shower drain is located in the center of the shower pan and allows water to drain away. Begin by removing the drain cover and setting it aside.
Next, apply a bead of caulk around the base of the drain flange. Then, insert the drain flange into the hole in the shower pan and secure it with screws.
4. Installing the P-Trap
The P-trap is a curved pipe that connects the shower drain to the main drain line. Begin by connecting one end of the P-trap to the shower drain using a slip joint nut.
Then, connect the other end of the P-trap to the main drain line using a PVC pipe and fitting.
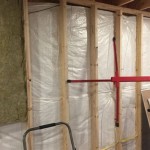
5. Connecting the Water Supply Lines
The water supply lines connect the shower head to the main water supply. Begin by shutting off the main water supply and draining any remaining water from the pipes.
Next, connect the hot and cold water supply lines to the shower head using flexible water supply lines.
6. Installing the Shower Head
The shower head is the final component to be installed. Begin by wrapping the threads of the shower head with Teflon tape.
Then, screw the shower head onto the water supply line and tighten it using an adjustable wrench.
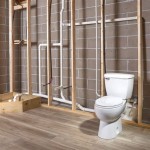
7. Finishing Touches
Once the shower is plumbed, you can add any finishing touches, such as tile or other wall covering. You can also grout and caulk the joints between the tiles to create a waterproof seal.
Conclusion
Installing a shower in a basement can be a challenging project, but it's also a rewarding one. By following the steps outlined in this guide, you can complete the project yourself and save money in the process.

How To Plumb A Basement Bathroom Diy Family Handyman

How To Plumb A Basement Bathroom Diy Family Handyman

How To Add A Bathroom Basement The Easy Way Diy Family Handyman

How To Plumb A Basement Bathroom

Basement Bathroom Layout Up To Code Doityourself Com Community Forums

Basement Bathrooms Things To Consider Home Construction Improvement

Installing Shower In Basement Without Rough Plumbing Home Improvement Stack Exchange

How To Plumb A Bathroom With Free Plumbing Diagrams

Bathroom Shower In Basement Along Foundation Wall Diy Home Improvement Forum

How To Finish A Basement Bathroom Before And After S