Painting Wood Paneling In Basement: Essential Aspects
Transform your basement from a dull and drab space into a vibrant and inviting area by painting the wood paneling. This guide will walk you through the essential aspects of painting wood paneling in your basement, ensuring a successful and professional-looking outcome.
Step 1: Preparation
Before you start painting, it's crucial to prepare the wood paneling. Begin by thoroughly cleaning the surface with a mild detergent and warm water solution. This step removes dirt, dust, and any previous cleaning agents that could interfere with the paint's adhesion.
Step 2: Priming
Once the paneling is clean, apply a primer specifically formulated for wood surfaces. Priming creates a barrier between the wood and the paint, ensuring better adhesion and preventing the grain from showing through. Use a brush or roller to apply the primer in even, thin coats, allowing each coat to dry completely before applying the next.
Step 3: Choosing the Right Paint
Selecting the appropriate paint is essential for achieving the desired look and durability. Opt for a high-quality latex or alkyd paint specifically designed for wood paneling. Consider the sheen level, choosing between flat, eggshell, satin, or semi-gloss depending on the desired finish.
Step 4: Painting Techniques
Use a brush or a roller to apply the paint. For areas with intricate details or hard-to-reach corners, use a brush for precise application. For larger, flat surfaces, a roller will provide efficient and even coverage. Apply thin, even coats, allowing each coat to dry completely before applying the next. Avoid over-brushing or overloading the roller, as this can lead to drips or unevenness.
Step 5: Ventilation and Safety
Ensure adequate ventilation during the painting process. Open windows and doors to allow fresh air to circulate and prevent fumes from accumulating. Wear appropriate safety gear, including a respirator, gloves, and eye protection, to minimize exposure to paint fumes and particles.
Step 6: Drying and Curing
Allow ample time for the paint to dry and cure completely. Refer to the manufacturer's instructions for specific drying and curing times. Avoid using or touching the painted surface during this period to prevent smudges or damage.
Step 7: Maintenance
To maintain the painted wood paneling in good condition, regular cleaning is crucial. Use a soft, damp cloth to wipe down the surface periodically. Avoid using abrasive cleaners or sponges, as they can scratch or damage the paint finish.
By following these essential aspects, you can successfully paint wood paneling in your basement, transforming it into a fresh, modern, and inviting space. Remember to prepare adequately, choose the right materials, use proper painting techniques, and follow safety precautions for a professional and lasting result.

House Renovation Week 12 Paint That Paneling People Southern Hospitality

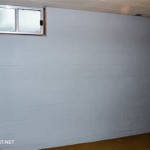
Painted Paneled Basement Revealed

House Renovation Week 12 Paint That Paneling People Southern Hospitality

I Would Love To Paint Our Front Room Wood Paneling White Living Designs Home Decor

House Renovation Week 12 Paint That Paneling People Southern Hospitality

Painted Paneling In Basement But Could We Keep The Green Bar Makeover White Wainscoting Painting Wood

How To Paint Wood Paneling Diy Instructions Monica Benavidez

Painted Paneled Basement Revealed

Painted Wood Paneling Rc Willey

Basement Reveal Wood Paneling Makeover Remodeling
See Also