Waterproofing Basement Walls From Inside: A Comprehensive DIY Guide
A damp basement can be a major headache, leading to mold, mildew, and structural damage. However, waterproofing your basement walls from the inside is a cost-effective and manageable DIY project that can prevent these issues. Here's a comprehensive guide to help you do it.
Step 1: Prepare the Surface
Start by removing any furniture or obstacles from the basement. Then, clean the walls thoroughly using a pressure washer or a stiff brush with detergent. Remove any loose paint, peeling wallpaper, or efflorescence (white powdery deposits).
Step 2: Apply a Waterproofing Membrane
Choose a waterproofing membrane specifically designed for interior basement walls. These membranes are typically made of rubber, PVC, or polyethylene and come in rolls or sheets. Apply the membrane to the walls using an adhesive or mechanical fasteners according to the manufacturer's instructions. Overlap the seams and seal them with a waterproofing tape.
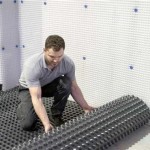
Step 3: Install a Drainage Mat
A drainage mat, also known as a dimple board, creates a space between the waterproofing membrane and the wall, allowing moisture to escape. Place the mat on top of the waterproofing membrane and secure it using plastic anchors or adhesive.
Step 4: Install a Sump Pump (Optional)
If your basement is prone to flooding, consider installing a sump pump. A sump pump is a submersible pump that removes excess water from the basement and pumps it outside. Install the sump pump in the lowest point of the basement and connect it to a discharge pipe.
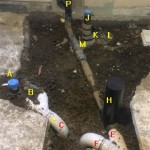
Step 5: Seal Cracks
Inspect the walls for any cracks or holes. Use a hydraulic cement or epoxy patching compound to seal these cracks. Apply the compound liberally, ensuring it penetrates the crack completely. Allow the patching compound to cure according to the manufacturer's instructions.
Step 6: Apply a Vapor Barrier
A vapor barrier on the interior wall surface prevents moisture from seeping into the basement from the outside. Install a vapor barrier made of polyethylene or aluminum foil over the waterproofing membrane and seal the seams with tape.
Step 7: Insulate the Walls (Optional)
Insulating the basement walls can help improve energy efficiency and prevent condensation. Install insulation batts or foam boards between the studs or joists in the walls. Cover the insulation with drywall or paneling.
Tips:
- Wear appropriate safety gear, including gloves and eye protection.
- Allow sufficient time for each step to cure or dry before moving on to the next.
- Use high-quality materials and follow the manufacturer's instructions carefully.
- If you encounter any unexpected problems or are unsure about any step, consult a professional.
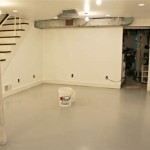
By following these steps, you can effectively waterproof your basement walls from the inside, protecting your home from water damage and creating a healthier and more comfortable living space.

Diy Basement Waterproofing By Triad

Diy Basement Waterproofing Waterproof Your Walls And Flooring Life S Dirty Clean Easy

Diy Basement Waterproofing Sealonce System Easy Installation Waterproof Com

How Does Interior Basement Waterproofing Work

How To Waterproof Your Basement True Value

Your Diy Guide On How To Waterproof Basement Walls Using Liquid Rubber

How To Waterproof Basement Walls From Inside Sani Tred

Basement Waterproofing How It Works Costs

Waterproofing Basement Walls Dos And Don Ts To Remember Bob Vila

The 3 Major Approaches To Basement Waterproofing News And Events For Systems Inc
See Also